h1

Going Into A Cocoon…

3 September, 2011

I’m sorry I’ve been away so long! I promise this blog is not dying, and I have no plans on shutting it down anytime soon. In fact, I want it to become more active and grow, but right now, I’m taking 5 classes, doing an instructional assistantship for another, preparing for my Senior Gallery Show, and working 20-30hrs a week to make rent. So, while I am still making things and creating stuff, I just don’t have the time to write about it all! I promise, though, come December, you can expect a deluge of posts! Tutorials, shared posts, discussions, lots of fun stuff!

In the meantime, I want to know what you want to know! Let me know what you’d like to see on OpenSourceStitches by voting below!

h1

Pattern Drafting 101: Sidebar – Ralph Pink

4 March, 2011

A few weeks ago, I came across Ralph Pink’s documentary blog by sheer random happenstance. An up-and-coming UK fashion designer, he’s documenting the process of setting up his own brand. His goal is, as he puts it, “to become one of the UK’s leading couture designers.”

This guy is incredible. Not only does he offer some really stylish vintage-style patterns for free for both men and women, he also offers free premade block patterns for bodices, dresses, skirts, and trousers. He also has a multitude of links to various fashion/sewing blogs that are great jumping off points. Not only that (and this is where it gets really exciting), he’s come up with an ingenious tool for drafting blocks- the Measurement Generator.

You still have to do some of the work; it doesn’t guess your measurements based on height or anything silly like that. It’s better than that. You input your basic measurements into the spreadsheet, it does the rest. Based on your measurements, it calculates the length of every line you’re going to draw in drafting your block pattern and gives you the length of that line. Below this is a diagram of a finished block pattern, to illustrate where every line and point is supposed to go. It’s really easy; I highly recommend this tool to anyone, particularly anyone who’s been having trouble with the previous drafting posts I’ve put up. I tried it out to see where people were having trouble, and wound up getting stuck myself. I was able to finish my block based on Ralph Pink’s calculator in a little over 2 hours, with no trouble at all. In fact, I’ll probably be replacing the Bodice Block tutorial with a newer version based on his calculator program.

The Measurement Calculator is in Part 2 of his first block of tutorials on digital pattern cutting. Check out the rest of the tutorials here: http://www.ralphpink.com/tutorials/tutorial-1 You can download the calculator as a Microsoft Excel document (and watch the instructional video) here: http://www.ralphpink.com/archives/821

h1

“Pink Boys” – Discussion

22 February, 2011

I apologize for the deviation from my normal topics, but I would love to get some discussion going on this topic.  A friend of mine, Eric of Writing Rules, posted this article on Facebook yesterday, and I felt it merited consideration my by the creative community.  Creation, be it sewing, knitting, crocheting, crafting, whatever- is always associated with the feminine, so what about crafty boys? Moms of crafting boys, I’d love to get your insights into this.

“My Son, The Pink Boy” by Sarah Hoffman

Also:

Men Who Knit

Real Men Crochet

Real Men Quilt

h1

To Anyone Who Thinks They Can’t

21 February, 2011

This applies to any creative endeavor- sewing, knitting, crocheting, art, photography, writing, sculpting, rughooking, rugbraiding, papercrafting, woodworking, ANYTHING.

To everyone who thinks that they can’t be creative- it’s not true. You can. You just don’t.

To everyone who has told me, “I wish I could make things like that”- you can.

To everyone who has told me, “You’re amazing!”- I’m no more amazing than you are. You could do it too, if you only tried.

To everyone who has said, “I can’t even sew a straight line”- it takes practice. You just have to be persistent and try.

To everyone who thinks they can’t learn something new because they’re too old, too young, too inexperienced- you’re lying to yourself and to everyone else.

You have learned to do many things throughout the course of your life. You learned how to walk, even though you’d never done it before. You learned to feed yourself. You learned to read, you learned to spell, to add and subtract. You learned to solve complex equations, you learned human anatomy, you learned literature, history, sports, economics, problem solving- whatever it was you were interested in, you studied it and learned it. Why is anything creative so much harder?

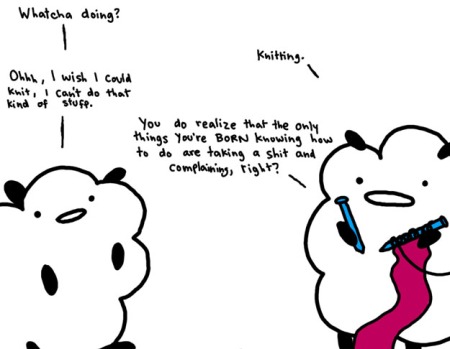
When you were born, you knew how to do only basic tasks- breathe, eat, poop, and complain. And look at you now. Look at how far you’ve come. If you want to learn something, you can learn it. You have an amazing capability to learn and create and do wonderful things. You are free to learn anything at any time in your life. The only thing stopping you is you. The only thing stopping you from doing anything you want to do is you, telling yourself, “I can’t.” That is a dirty rotten lie.

You  can.


h1

Pattern Drafting 101 – The Men’s Shirt Sleeve Block

18 February, 2011

Thank you all for your support- it makes me incredibly happy to see all those hits on my drafting posts! Let me know if there’s anything you want to see and feel free to post comments or questions!

Also, my fiancé pointed out to me today that I should include a glossary of terms on this site, so starting with this post, I’m including hyperlinks to the new glossary page. I’ll be going back and adding them to the older posts soon.

For the men’s shirt sleeve, you’re going to need the following:

  • Pencil
  • Ruler
  • Newsprint Paper (It’s easier to see through than thicker papers and will be useful in transferring the markings from the shirt to the sleeve. It’s also fairly inexpensive and readily available at most craft stores.)
  • A copy of your completed Men’s Shirt block – you’ll be using markings from this to create the sleeve, so make sure you haven’t erased your marked points.

Step 1: Rename the Points- For the sake of simplicity, we’re going to rename some of the points on our completed Men’s Shirt block to use on our Sleeve Block. Rename the following points according to the chart below.

Shirt Block Replace with….
Point K Point (a)
Point L Point (b)
Point Y Point (f)
Point U Point (g)
Point M Point (h)

Step 2: Measure the Armscye- Lay a flexible measuring tape or a length of string along the armscye curve. Record this measurement. Extend the line (ab) upwards a distance of 1/3 the armscye measurement and mark the end point (c).

Step 3: Drawing in the Construction Lines- Extend the Armscye Line out to the left, through point B. It doesn’t really matter how far, just far enough. You can always make it longer if you need to. Do the same from Point (c). Mark point (d) halfway along line (ac), and extend a line out to the left of point (d) approximately the same length as your other two construction lines. These lines don’t need to be drawn in very heavily; you’ll only be erasing them at the end.

Step 4: Mark Some New Points- Where the construction line from (d) intersects with the left side of the armscye, mark the point (e).

Step 5: Measure and Pivot- Measure the distance from (f) to (b) in a straight line. Add 1.5cm to this and record. Pivot your ruler on point (b) until it intersects with the topmost construction line at the distance you just recorded, to the left of point (b). Draw the line and mark the endpoint (i).

Measure the distance again from (g) and (e) in a straight line. Add 1.25cm and record. Pivot your ruler on point (i) until it intersects with the middle construction line at the distance you just recorded, to the left of point (i). Draw the line and mark the endpoint (j).

Step 6: Measure and Pivot again- Measure the distance along the curve from (e) to (h). Add 1.25cm and record. Pivot your ruler around point (j) until it intersects with the Armscye Line at the distance you just recorded, to the left of point (j). Draw the line and mark the endpoint (k).

Measure the distance again along the curve from (b) to (h). Add .75cm and record. Pivot your ruler on point (b) until it intersects with the Armscye Line at the distance you just recorded, to the right of point (b). Draw the line and mark the endpoint (l).

Step 7: Sleeve Length- Draw a vertical line straight down from point (i) to the desired sleeve length (This block creates a long dress-shirt sleeve. I’ll go over pattern editing for shorter sleeves at a later date. For now, it’s good to have a longer base to work from). Mark the endpoint (m).

Step 8: The Hem Line- Draw a horizontal line to the right of point (m) until the end lines up with point (l). Mark the end point (n) and connect (n) to (l) with a straight line. (mnl) should be a right angle. Do the same for the left side, marking the end point (o) and connecting (o) to (k)

Step 9: Suppressing the Shirt Block- Go ahead and get rid of your shirt block lines at this point. You won’t need them after this. Make sure to keep everything you’ve done on the sleeve so far.

Step 10: Shaping the Sleeve- Measure 5cm inward from (n). Mark the point (p), and connect it to point (l). Do the same on the other side, marking the resulting point (q) and connecting it to point (k).

Step 11: Sleeve Slit- Mark point (r) midway between (m) and (q). Draw a short, 1cm line straight down from point (r), and mark the end point (s). Draw a line straight up from (s) 10cm long. Mark the end point (t). The line (st) will become the sleeve plaquette in the finished pattern.

Step 12: The Sleeve Hem- Draw a curved line connecting points (m), (s), and (q).

Step 13: Drawing the Sleeve Cap– Connect the points at the top of the sleeve with curved lines, following the chart below.

From point… To point… Direction of Curve Maximum Deviation

k

j

Downward 0.75cm

j

i

Upward 1.5cm

i

x

Upward 2cm

x

b

None (straight) 0cm

b

l

Downward 0.75cm

Step 14: Marking the Elbow Line- Find the halfway point between  (n) and (t); 2.5cm above that, mark a point (z). Draw a horizontal line through (z) until you reach the line (kq). This is the elbow line of the sleeve.

Step 15: Cleaning up- erase all the construction lines, and you should be left with something that looks like this:

Tada! You’re done! You now have a completed men’s shirt sleeve block ready to be turned into something amazing!

h1

Pattern Drafting 101 – The Men’s Shirt Block

17 February, 2011

These Pattern Drafting posts seem to be really popular- thank you so much!

Next up in the Pattern Drafting 101 Series, the Men’s Shirt Block, again from Gedwood’s BurdaStyle tutorials, located here. This block will not be as form-fitting as the women’s bodice block, but for the most part, men’s fashions tend toward looser styles. With a little tweaking (and we’ll be getting into some “uber-leet pattern editing hax” later), you can use this block to create more tailored men’s fashions. This one is a little long, since it incorporates the sleeve as well, so I’m going to split this post into two.

Again, you will need pencils and a large pad of paper, a long ruler, and a french curve.

* ** *** ** *

Step 1: Mark Point A. Orient your paper in landscape orientation, or with the longest dimension running horizontally in front of you. Mark a point in the upper left hand corner about 1cm from either edge of the paper. Mark this point A. Draw straight down from this point the distance of the armscye depth + 2.5 cm. Mark the endpoint B.

Step 2: Mark Point C one half the chest measurement + 8cm to the right of Point B. Connect points B and C. Line BC is the Armscye line of the shirt.

Step 3: Draw straight up from Point C the same distance as line AB. Mark the endpoint D.

Step 4: Draw guideline AD. This line won’t show up in the finished product, so you may want to draw it in lightly.

Step 5: Extend the line AB downwards until the whole line measures the distance of the waist length + 1cm. Mark the endpoint E. Do the same for line DC, marking that endpoint F. Connect E and F with a horizontal line. This line should be the same length as line BC. Line EF is the waist line of the shirt.

Step 6: Extend the line AE downwards again to the desired length of the finished shirt, plus 1 cm (3/8 in.) and mark the end point G. Do the same from line DF, marking the end point H. Connect points G and H with a straight line. Line GH is the hemline of the shirt.

Step 7: Measure along the Armscye Line a distance of half the back measurement plus 2.5cm. Mark that point I. Draw a perpendicular line from Point I to Line AD. Mark the point where they meet Point J.

Step 8: Measure from point B along the Armscye Line, a distance of 1/3 of the chest measurement + 1.5cm. Mark the endpoint K. Draw a vertical line upward from point K 3.5cm. Mark the endpoint L. Later on, we’ll use Line KL to help us define the sleeve.

Step 9: Measure the distance from point I to point K along the Armscyle Line. From point K, mark a distance of half the IK measurement minus 0.5 cm  to the left along the armscye line. Mark this point M. Draw a vertical line down from this point, crossing the Waist Line (mark the intersection point N) and meeting the Hem Line (mark this point O).

Step 10: Measure the distance of ½ the Armscye depth plus 1cm down from point A. Mark this point P. Draw a horizontal line from point P to meet the line IJ. Mark this point Q.

Step 11: From point A, measure 1/5 of the neck measurement minus 0.5cm to the right. Mark the end point R. Draw a short vertical line up 2cm from Point R. Mark the end point S. Draw a curved line from point A to point S. This is the back of the neck line.

Step 12: Measure up from point Q ¼ of the Armscye depth plus 4 cm. Mark this point T. Then measure 3.5cm to the right of Point T. Mark this point U.

Step 13: Connect Points S and U with a straight line. This is the back shoulder seam.

Step 14: Measure 1/5 of the neck measurement down from point D. Mark the endpoint V. Measure the same distance minus 1cm to the left of point D. Mark this point W. Draw in the neck curve between points V and W.

Step 15: Draw a short, 2cm line down from point U. Mark the end point X. Draw another line from X to the right about halfway to Line CD.

Step 16: Measure the line SU. Add 0.5cm to that measurement and record that amount. Pivot your ruler around on point W until it intersects with the horizontal line X at the distance you just recorded. Connect the two points and mark this intersection point Y.

Step 17: Connect Points Y and L with a straight line. Draw this line in lightly, you’ll be erasing it in just a little bit.

Step 18: Construct the Armscye by connecting points U, Q, M, L, and Y with a curved line. Make sure that the curve stays within 1.25cm of line LY, within 1.75cm of point K, and within 3 cm from point I.

Step 19: Erase all extraneous lines, leaving only the outer lines, the armscye line, the waistline and the center line MO. You should have something that looks like this:

h1

The Plague

15 February, 2011

We have around here what we like to refer to as, “The Plague”, which is a yearly epidemic that sweeps the campus. It changes every year, and this year, it’s a 24 hour stomach bug. And I have it.

So while I’m here in my self-imposed quarantine, I thought I’d bring you some fun things from the Internet.

I preface this by saying that I’m one of those people that, if it weren’t for things like ice, heat, glass and other foreign particulates that can easily become embedded in the epidermis covering the soles of my feet, etc., I would never wear shoes. I just love to be able to feel the ground under me. My favorite pair of shoes I ever owned was an old beat-up pair of ballet slippers from a play I acted in in high school. Being leather, they gave a decent amount of protection from hot pavement, debris, detritus and other  foreign objects, but still let me feel everything that was going on beneath me. They looked something like this:

They were also super comfortable and always made me want to dance.  🙂

Being barefoot (or near enough to it) has it’s health benefits. Recent science has even proven that running barefoot results in a better stride and is, over time, less taxing on your body than running in sneakers- thus the advent of Vivram’s FiveFingers shoe. Toddlers and children who go barefoot more often develop faster both mentally and in musculature- ” ‘The barefoot walker receives a continuous stream of information about the ground and about his own relationship to it, while a shod foot sleeps inside an unchanging environment. Sensations that are not used or listened to become decayed and atrophy. There is a sense of aliveness and joy which I experience walking barefoot that I never get in shoes,’ he says.” (Dr. Paul W. Brand, 1976)

Shoes are also really expensive. The last pair of sneakers I bought cost me around $20, and were retired after 18 months of use.

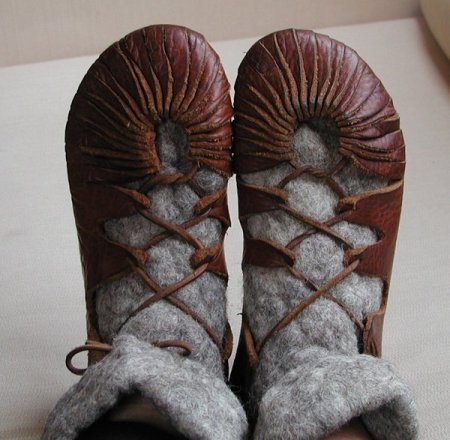
So while searching around Instructables the other night, I found these beauties, which seem to remedy the problems of price and sensitivity-

Norse-Inspired Leather Shoes!

Skymring's Norse-Inspired Shoes

They look so incredibly comfortable and easy to make, I’m making myself a pair as soon as I get a hold of some leather.

Many thanks to Skymring, who put these up for all to see! The full instructions are freely available HERE.

h1

Happy Christmahanyulekwanzikus!

25 December, 2010

… just making sure I’ve got all my bases covered. I’ve got Christmas, Hanukkah, Yule, Kwanzaa, and Festivus in there… Lemme know if I forgot anything.

I interrupt this not entirely unseen hiatus for a breaking announcement.

I’m getting married.

Not for almost another year and a half, but it’s going to take us most of that time just to plan it out.

It’s finally sunk in that, no, I’m not dreaming, and am not going to wake up from this any time soon, so I feel it’s safe to start doing something about this now.

I’m going to try to continue with the pattern drafting series as best I can, but I’ll also be throwing up some wedding planning tips, ideas, how to’s, and some of our own plans and photos.

Warning- I have no internet on my personal computer right now, and I don’t know when I will, so updates may be slow in coming.


-E

h1

Pattern Drafting 101 – The Basic Bodice Sleeve Block

19 July, 2010

So, I’ll admit, I kinda dropped the ball on updating this week. No excuses, though, so here it comes. All the updates from the past week. One right after the other.

First up, the Set-In Sleeve block. This pattern is going to be made to fit, and thus will be based on, the Basic Bodice Block you made in the previous post.

You will need paper, a pencil, a ruler, and a french curve.

* ** *** ** *
Because the original measurements are metric, and their US standard equivalents would be near impossible to accurately measure (1/5 of an inch?), I’m going to stick with the metric measurements.
* ** *** ** *

Step 1: Trace on the top of the bodice block, from the base of the armscye, up. You can do this either by copying the shape to a new large piece of paper or cardboard, or by using a tracing paper overlay. Be sure to include the point labels; you’ll be needing them a lot.

Step 2: Extend Point T vertically so that it passes through point Y, touching the edge of the armscye.

Step 3: Mark the point above point T one third of the total armscye measurement, not the half armscye measurement we were using before on the main bodice. Label this point AC.

Step 4: Draw a new line horizontally at the level of point Y, midway between points T and AC.

Step 5: Mark the point where the line from Y crosses the left-most edge of the armscye curve. Label that point AD.

Step 6: Mark the point halfway between points T and Y. Label that point AE. Draw a very short horizontal line across to the ARMSCYE curve and mark the intersection. Label that point AF.

Step 7: Measure the length of the ARMSCYE curve between point AF and point X at the top – not the length of the straight line connecting points AF and X, but the distance ALONG the curve. To do this, drape a small piece of string along the curve and then measure the length of the string when it is straightened out.
Now, add 1 cm to this (for bust sizes 94cm-107cm, add 1.25cm. For bust sizes above 107cm, add 1.5cm.) Zero the ruler at AF, and pivot the ruler until this length meets the horizontal line at AC. Mark the point at the intersection point AG.

Step 8: Measure the distance again along the curve between the point AD and Point I at the top of the left part of the armscye curve.
Add 1cm to this distance (1.25cm for bust sizes 94-107cm, 1.5cm for bust sizes larger than 107cm.) Zero the ruler at point AF, and pivot the ruler until the intersection with the horizontal line at the Y level corresponds to the length just calculated. Label this p‌oint AH.

Step 9: Measure the distance from Z to AF along the curve. Subtract 0.3cm. Zero the ruler at point AE, and pivot the ruler until the intersection with the horizontal line that passes through point T corresponds to the length just calculated. Label this p‌oint AI.

Step 10: Measure the distance from AD to Z along the curve. Subtract 0.3cm. Zero the ruler at point AH, and pivot the ruler until the intersection with the horizontal line that passes through points T and Z corresponds to the length just calculated. Label this p‌oint AJ.

Step 11: Drop a line vertically from the summit point AG. This line will be the length of the sleeve measurement, taken from the top of the shoulder to the wrist. Mark the end point AK.

Step 12: At this point in construction the basic bodice you traced earlier is no longer needed. Go ahead and erase any of the unused lines and points. They won’t be shown in any of the diagrams beyond this point, just to keep things clear and easy to follow.

Step 13: Drop a vertical line from points AI to the horizontal line passing through point AK. Mark this new point AL. Drop another vertical line from point AJ to the same horizontal line. Mark this new point AM. Draw a new horizontal line from AL to AM.

Step 14: Draw in a curve from AI to AH, hollowed below the diagonal by a maximum of 0.75cm.

Step 15: Continue the curve above the line from AH to AG, raised 1 cm at maximum deviation. Make sure that the curve flattens to the horizontal as it passes through point AG.

Step 16: Continue the curve downwards to point AE, passing 2 cm at maximum deviation above the line connecting AG and AE.

Step 17: Finish the curve of the sleeve head, dropping it below the line connecting AE and AI by 1 cm at maximum deviation, and making sure it approaches the horizontal at point AI. Note that the sleeve head shape is asymmetrical – this is as it should be.

Step 18: If you wish to introduce some shaping into the sleeve, you may narrow the sleeve by a distance of from 1 to 3 cm on each side. This is completely optional. If you do, mark your new points AN (1-3cm in from point AL) and AO (1-3cm in from point AM)

Step 19: Lower the sleeve edge curve by 1 cm on the section between AN and AK (the back section of the sleeve). Raise the sleeve edge curve by 1cm on the section between AK and AO (the front section of the sleeve).
*If you chose to skip the shaping, replace “AN” with “AL” and “AO” with “AM”

Step 20: This is the final outline of the sleeve. The waist line on the bodice block marks the location of the elbow on the sleeve.

Ta-Da! You’re done! Enjoy the endless possibilities your new personalised sloper will bring!

h1

Pattern Drafting 101- Drafting the Basic Bodice Block

14 July, 2010

The Basic Bodice Block- the only pattern you’ll ever need to make any kind of garment for the upper body- tees, blouses, tanks, sweaters, coats, vests, even bras! Drafting the Basic Bodice Block requires a knowledge of basic high-school geometry, but once you’ve finished, you have a universal pattern for all your upper body sewing needs fit to your own body, not to a set of predetermined body measurements based on the “average” person.

(These instructions taken from Gedwoods of Burdastyle.com. I have simply rewritten them for ease of reading. His original instructional post can be found here.)

First things first, you will need:

  1. Your body and a measuring tape
  2. a ruler, preferably a long one
  3. a large pad of paper, or several sheets of printer paper taped together. Your paper should be 2″ wider than half your bust measurement.
  4. pencils and erasers
  5. a french curve, specifically one designed for working armholes and necklines

*  **  ***  **  *

Because the original measurements are metric, and their US standard equivalents would be near impossible to accurately measure (1/5 of an inch?), I’m going to stick with the metric measurements.

*  **  ***  **  *

Step 1: Mark Your Origin. Orient your paper in landscape orientation, or with the longest dimension running horizontally in front of you. Mark a point  in the upper left hand corner about 1cm from either edge of the paper. This is your origin point, your home base, and all your measurements and lines are going to be based on this point. Mark this point O.

Step 2: Square Off. From your origin point O, measure down 1.5cm parallel to the vertical edge of the paper and draw a line to that point. Mark that point A.

Step 3: Armscye Depth. From point A, you will now measure down the armscye depth plus 0.5cm. The armscye is half the circumference of the arm at the shoulder joint. Mark the end point B.

Armscye Depth

Step4: Bust Width. From point B, draw a line perpendicular to line AB. This line will be half the length of the bust measurement plus 5cm. Mark the end point of that line C.

Step 5: Drawing upwards from point C, draw a line parallel to line OB, for the same distance as the length of OB. If your bust measurement is 92cm or below, mark this point D. For bust sizes above 92cm, get out your calculator- you’re going to add 1/8th of the distance above 92cm. For example, someone with a 100cm bust measurement is 8cm above 92cm. 1/8th of 8cm is 1cm. Add this amount to the line you just drew off of point C, and mark the endpoint D. Draw a light line connecting points D and O. You’ll be erasing this line later.

Upwards from Point C

Step 6: Return to Point O. Drawing straight down again from point O, parallel to the vertical edge of the paper, mark the distance from the nape of the neck to the waist. I have a trick for finding the nape of my neck: Tip your head back as far as it will go, and rest two fingers on your neck where the back of the head and the back of the neck meet. Don’t force them into the crevice, just rest them there so that the tops of your fingers are touching your head and the bottoms are on your neck. Lift your head again, and your middle finger will be on your nape. The waist is the smallest point of the torso, and can be found by tying a narrow strip of elastic snuggly around your waist and bending your body- the elastic will roll to the narrowest part of your torso, your waist. Measure along the spine between these two points. Mark the endpoint of this new line point E.

Step 7: Square off as shown below. Mark the corner point F.


Squaring Off

Step 8: The Neck. Go back to point O, and measure across 1/5th of the neck measurement (taken around the neck at the nape) minus 0.2cm. Mark this point G. You need not connect points O and G, but if you choose to, draw the line lightly, as it will need to be erased later.

Step 9: Using the French Curve, draw a shallow curve from points A to G. This is your back neckline edge.


Constructing The Back Neckline Edge

Step 10: Returning to Point A. Measure down from point A 1/5th of the armscye measurement minus 0.7cm. Mark this point H. From Point H, draw a line perpendicular to the line OB that is half the distance of line BC (see illustration below).

Step 11: Shoulder Measurement. The shoulder measurement is somewhat tricky to get; you will probably need a second set of hands to help you out. To measure the shoulders, stretch the measuring tape across your back, from the very end of one shoulder to the very end of the other. Make a note of the measurement, you will need it later. Now, with your ruler zeroed on point G, pivot your ruler until the distance you need to mark (1/2 of the Shoulder Measurement + 1cm) intersects with the line your drew in Step 10. Mark the intersection point I. (A reader pointed out to me that these two lines may not intersect smoothly. If you’re finding that Line H is too short to accommodate your shoulder measurement, go ahead and extend line H out to fit. Remember, this sort of thing is based on averages and the “average” body structure, but in reality, not everyone conforms to that average.)

Finding the Shoulder

Step 12: Find the Point halfway between points G and I. Mark that point J. From point J, measure 5cm down and 1cm to the left. Mark this point K. Point K is the end of the shoulder dart.

Step 13: From Point K, draw two diagonal lines up to line GI. They should intersect with the line 1cm apart, and the lines should be of equal length.

The Back Shoulder Dart

Step 14: Back Measurement. From point B, measure and mark half the back measurement plus 0.5cm along the line BC. An easy way to obtain the back measurement is to put on a fitted t-shirt and measure across the back from armscye seam to armscye seam at the narrowest point (across the shoulder blades). Mark this point L.

Step 15: Square up from point L to the line HI. Mark the intersection point M. Be sure to pencil in this line lightly, as you’ll be erasing it later on.


Squaring Off Again

Step 16: Find the point halfway between L and M. Mark this point N. Also, find the point halfway between B and L. Mark this point P. Measure the distance between B and P, and mark this distance along the horizontal line from point E. Mark the end point Q. Draw a dashed line from Point P to Point Q.

Step 17: Moving to the Other Side, measure 1/5th of the neck measurement plus 0.7cm from point D, along the line DO. Mark this new point R.

Moving Along...

Step 18: Measure Down from point D 1/5th of the neck measurement minus 0.2cm. Mark this point S.

Step 19: Using your French Curve, draw a deep curved line from point R to point S. This is the front neckline edge.


Front Neckline Edge

Step 20: Bust Dart. From point C, measure towards point B the distance on 1/2 the Chest measurement plus 1/2 the dart size. Mark that Point T. This part can get a little tricky. To obtain the chest measurement, subtract the back measurement from the bust measurement. The dart size is not actually a measurement, but it is scaled with the bust size. To find your dart size, start with a 7cm dart and add 0.6cm to it for every 4 cm of bust above 88cm. Subtract the same amount from 7cm for every 4cm of bust below 88cm. So, a 100 cm bust has a 8.8cm dart, while a 84cm bust has a 6.4cm dart. Make note of your dart size. Draw a vertical line up from point T to just below line HI.

Step 21: Find the Halfway Point between points C and T. Mark this point U. Draw a dashed vertical line downward to intersect with line EF. Mark the intersection point V. This is the mid front line.


The Mid-Front Line

Step 22:  Mark the Bust Point 2.5 cm below point U. Mark this point BP.

Step 23: Using the Dart Size from step 20, measure from point R along the line DO. Mark the resulting point W. Now draw a line from point R to the Bust Point (BP), and from point BP to point W. These are the sides of your bust dart.


The Bust Dart

Step 24: Shift Your Attention to the construction line passing through points H, M, and I. Measure down 1.5cm and lightly draw in a new construction line, parallel to the first, across the middle of the block.

Step 25: Repeat the Pivoting Motion we did in step 11. Zero your ruler on point W and pivot the ruler until it crosses the construction line at the distance of the shoulder measurement. Mark this intersection point X.


Pivoting Again

Step 26: Measure Upwards 1/3 of the armscye depth measurement from point T and mark that point Y. Find the halfway point between points L and T. Mark that point Z. Draw a dashed vertical line down from point Z until it intersects the waistline (line EF), and mark that intersection point AA.

Step 27: Draw A Small Diagonal inward-pointing line from Point L and Point T. The length of that line will vary depending on your bust size.

Bust Measurement L Length T Length
82cm or smaller 2.25cm 1.75cm
82-94cm 2.5cm 2cm
94-107cm 3cm 2.5cm
Above 107cm 3.5cm 3cm

Step 28:Using your French Curve, draw in the armscye curve so that it passes smoothly through the construction points I-M-L Segment-Z-T Segment-Y-X.


Drawing in the Armscye

Step 29: Extend the line DF downwards by 0.5 – 1.5cm, depending on your bust measurement (0.5cm for small, 1.0cm for intermediate, 1.5cm for large). Mark the endpoint AB. Draw a line from AB to E. This ensures that the waist remains horizontal and doesn’t ride up.

Extending the Line

Step 30: Draw in Darts around each of the threedashed lines that extend from the lower boundary of the block (line AB to E) to the line BC. And this is where Gedwood’s directions become a little fuzzy and convoluted, so I’m going to attempt to unravel them:

(Thanks to Muushka for helping me to clarify these instructions!) At the end of this, what’s left of line E AB should measure out to ((Bust Measurement +3) + (Waist Measurement + 6))/2. For example, if you’re working with an 88cm bust and a 65cm waist, the math should go as follows

((88+3)+(65+6))/2

88+3=91
65+6=71
91-71=20 (This is the amount that needs to be taken out in darts all around)
20/2= 10 (This is how much we need to take out in darts on the pattern)

Dividing up the darts as evenly as possible, we get Back=3cm, Side=3cm, Front=4cm

Drawing in the Darts

Step 31: Redraw Your Block outline and cut along these lines to get the final, close-fitting basic bodice block!


The Final Product